Views and Visualization - Exercise 4
Learn Revit > Module 6 > Exercise 4
Exercise 4 — Adjusting the Appearance of Elements in a View
In this exercise, you will create an exterior perspective view and duplicate the view to apply different visual styles for presentation. In addition you will be introduced to some of the properties in Graphic Display Options.
Objectives:
-
Use the View Control bar to quickly change a views display properties―for example, the level of detail and the visual style.
-
Display shadows and specifying the location of the lighting source.
-
Set a project’s location and orientation to cast accurate shadows in a solar study.
-
Use Graphic Display Options to enhance the silhouettes of elements and add gradient backgrounds to 3D views..
Create an exterior perspective view using the Camera tool
-
Download the start file here.
-
Open the Site Plan plan view.
-
On the View tab, Create panel, click the 3D View pulldown menu and select Camera.
-
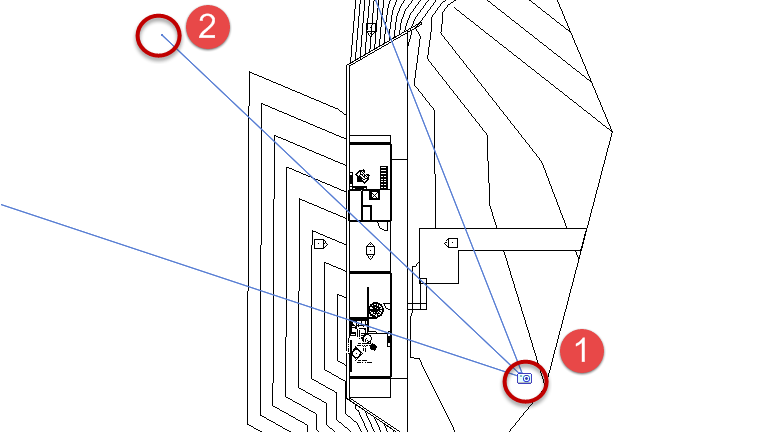
Place the camera at Mark 1 and set the far clip offset plane at Mark 2 as shown below.
-
Change the frame ratio to 16:9.
a. In the 3D View 1 3D view, select the crop region window.
b. Click Size Crop from Crop panel and set frame size to: 400mm wide by 220mm high.
c. Zoom to Fit view
-
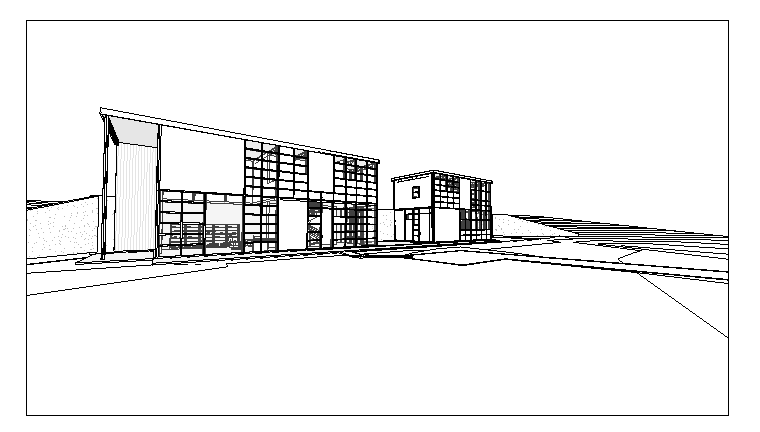
Adjust camera using the Navigation Wheel until your composition looks similar to the view below.
-
Rename 3D View 1 to: Exterior Perspective.
Review visual styles for Exterior Perspective view
-
On the View Control toolbar, select Visual Styles icon and apply each of the following styles to the current Exterior Perspective view to get a sense of what they do.
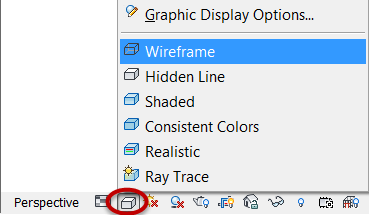
a. Apply Wireframe style or (WF) keyboard shortcut.
b. Apply Hidden Line style (HL).
c. Apply Shaded style (SD).
d. Apply Consistent Colors style.
e. Apply Realistic style.
-
Apply Hidden Line style (HL).
Note: Visual style is a view property and is permanent to the view when the project is saved.
Duplicate perspective view and apply different visual styles
Realistic style
-
Right-click on the Exterior Perspective 3D view name in Project Browser and Duplicate the view.
-
Right-click on the copied view in Project Browser and rename view to: Exterior Perspective – Realistic.
-
Apply Realistic style.
Shadow style
-
Right-click on the Exterior Perspective 3D view name in Project Browser and Duplicate the view.
-
Right-click on the copied view in Project Browser and rename view to: Exterior Perspective with Shadows.
-
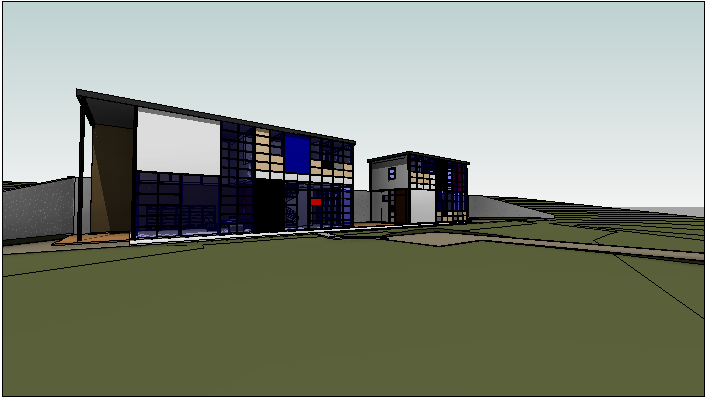
Apply Shaded style (SD).
-
Adjust Graphic Display Options.
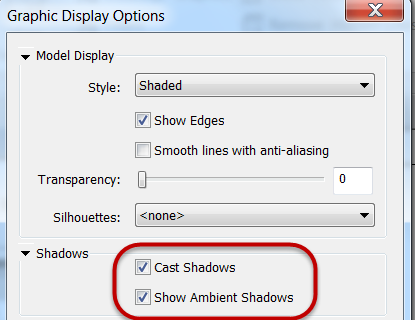
a. On View Control toolbar, select Visual Style, then Graphic Display Options…

b. Enable Shadows. Mark the checkboxes shown below.
c. Set Sun Setting parameters for view.
Mark 1 = Click In-session lighting button.

Mark 2 = Click Still radio button.

Mark 3 = Click Calendar button and click Year field.

Mark 4 = Set Year = 2015.

Mark 5 = Set Month = June.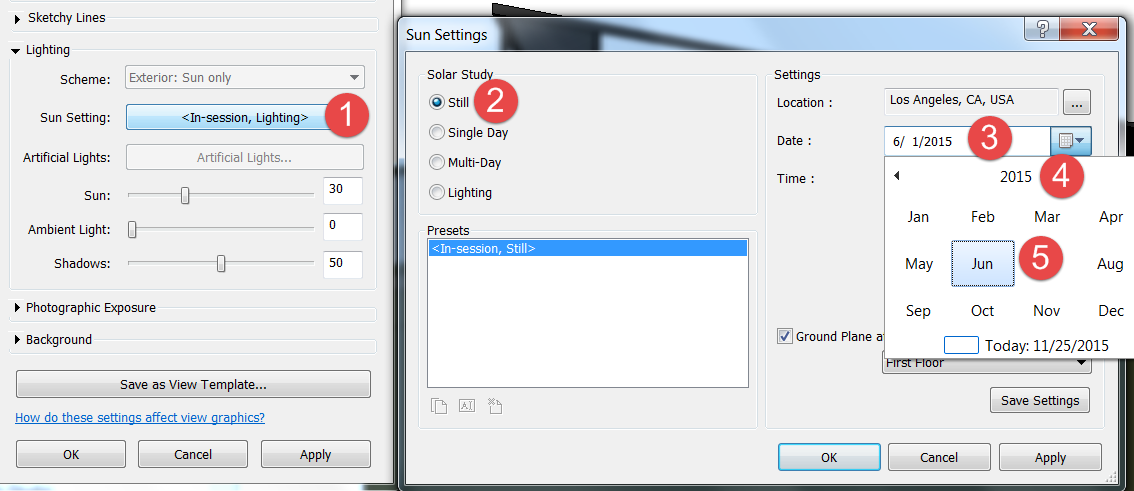
d. Set Background property.
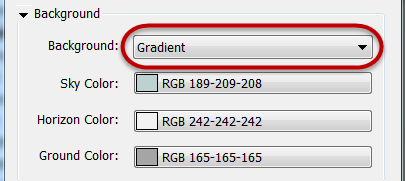
*Note: Accept default values.*e. Click OK to accept all Graphic Display Option settings.
-
Save the Revit file as: Module06Ex04.rvt
This concludes Exercise 4.