Views and Visualization - Exercise 3
Learn Revit > Module 6 > Exercise 3
Exercise 3 — Creating 3D Views
In this exercise, you will move beyond 2D orthographic views to create expressive 3D views for rich visualization.
Objectives:
-
Duplicate the Default 3D View to create additional orthogonal views.
-
Use the Autodesk® ViewCube® widget and the Autodesk® SteeringWheels® widget to change the view settings.
-
Use the section box to create 3D plans and section views.
-
Use the Camera tool to create new perspective views.
-
Adjust the crop region, far clip offset, and camera and target positions for perspective views.
Create a perspective view of the Residence Living Room using the Camera tool
-
Download the start file here.
-
Open the First Floor plan view and zoom into the Residence Living Room space.
-
Place a camera view in the room.
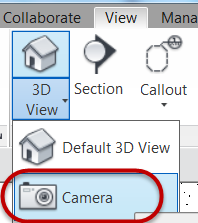
a. On the View tab, Create panel, click the pulldown menu for 3D View and select Camera.
b. Place the Camera at the south end of the living room (Mark 1) and left click to set that as the origin point and then drag the cursor beyond the extents of the living room space to Mark 2 and left click.
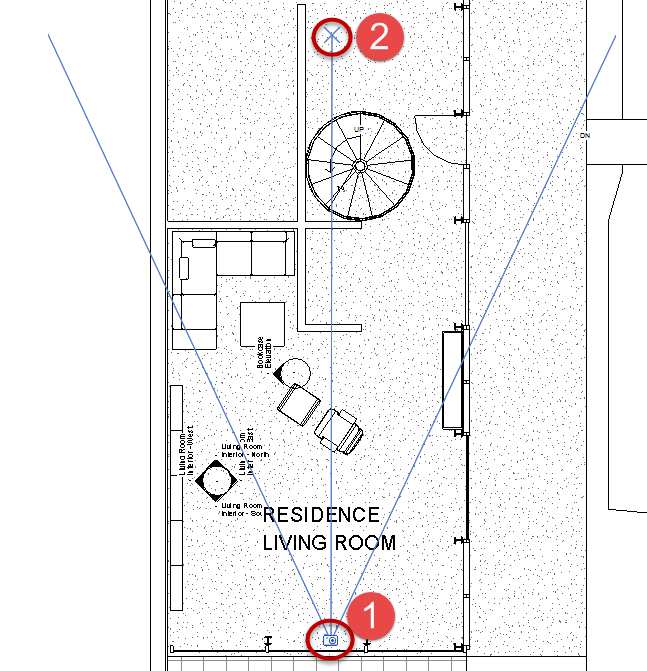c. In Project Browser, view 3D View 1 3D view was automatically created and opened for you.
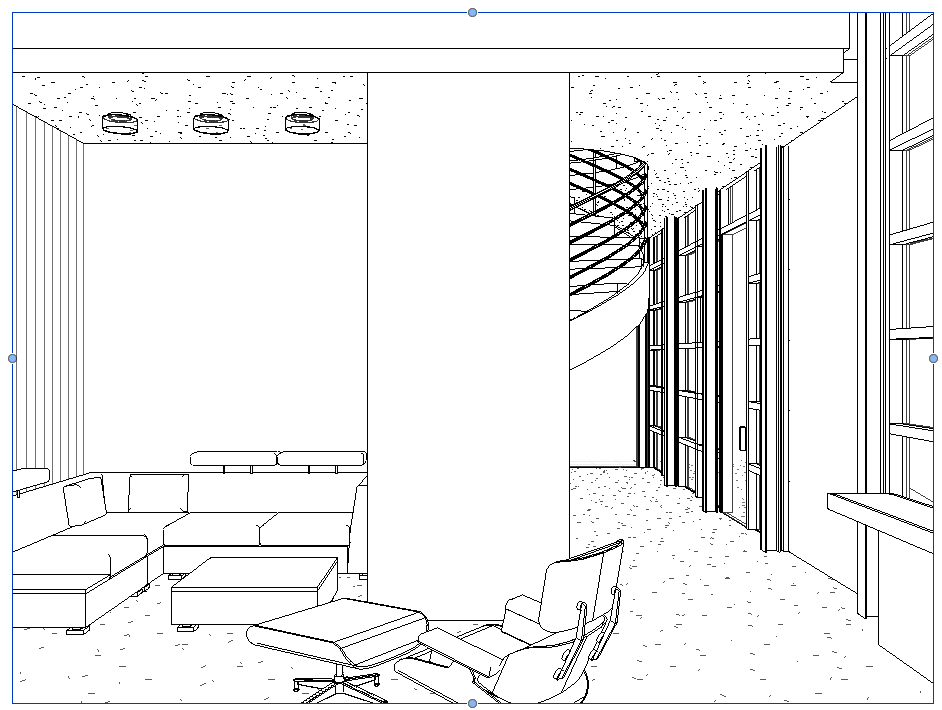 -
Change crop region proportion to 16:9 format.
a. Select the 3D view crop region window.
b. Click Size Crop from Crop panel.
c. Set width = 400mm
d. Set height = 220mm)

e. Click OK.
-
Zoom to Fit view (ZF).
-
Rename the 3D view to:
Living Room Interior.
-
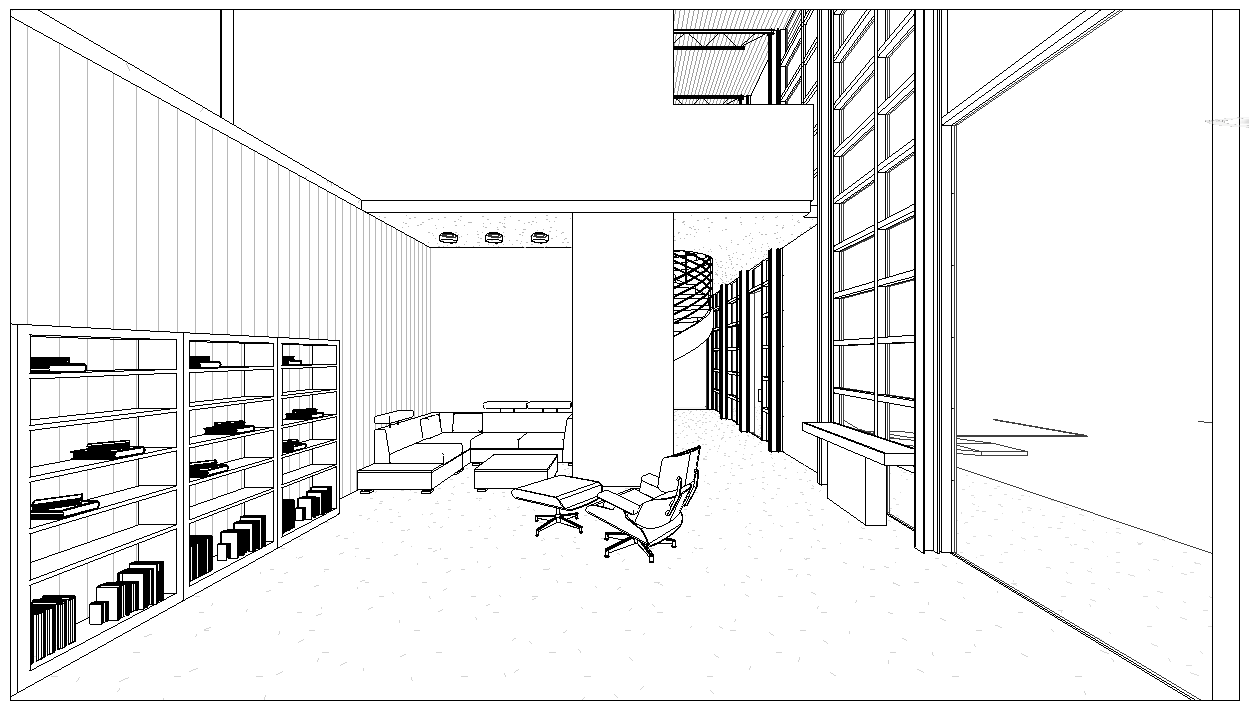
If you need to make camera adjustments for the view use the Navigation Wheel.
a. Open Navigation Wheel by left clicking over it.
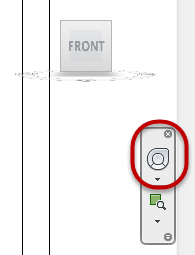
b. Use any of the following functions to compose the scene as desired
(Walk= Mark 1, Up/Down= Mark 2, and / or Look = Mark 3)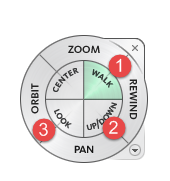
c. To close Navigation Wheel, click the X in the upper right corner of Navigation Wheel.
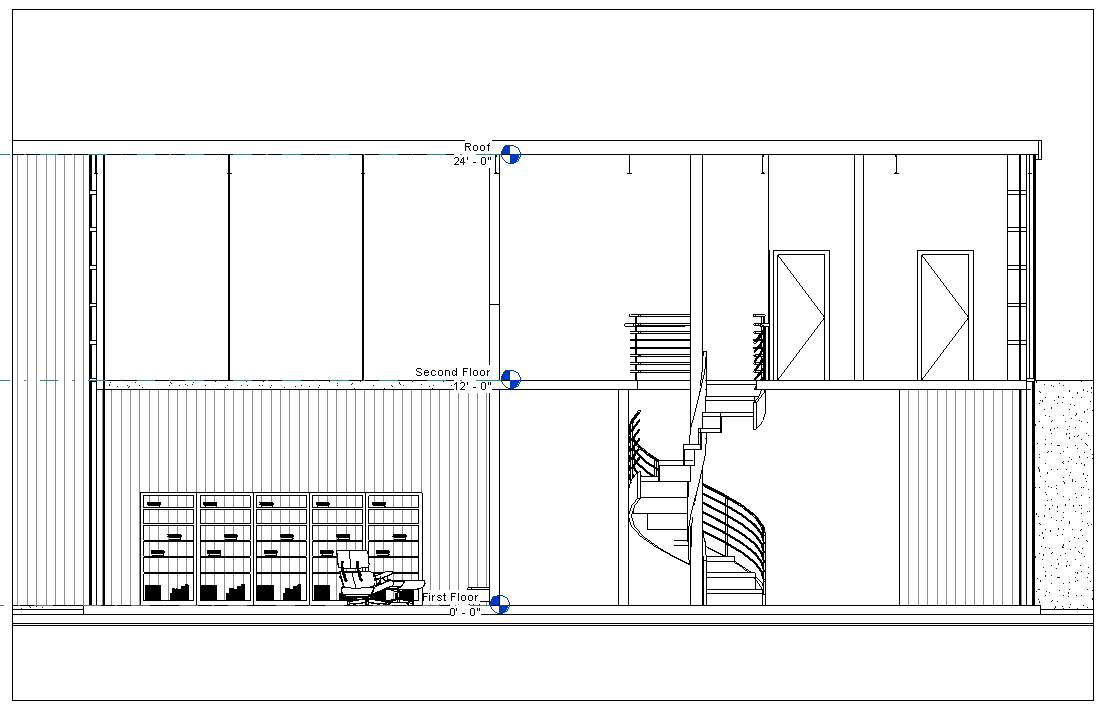
Create a 3D section cutaway view of the Residence building
-
Open First Floor - Residence plan view.
-
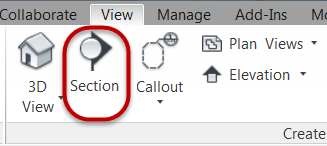
On the View tab, Create panel, click the Section command.
-
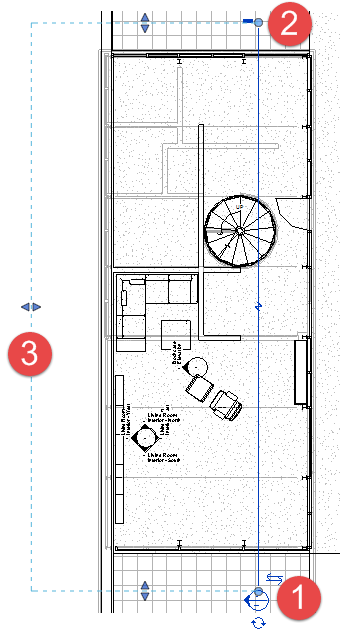
Place the section head outside of the Residence building at Mark 1 and left click to set and then drag cursor straight up and left click at Mark 2 to set the cutplane extents of the section view. Mark 3 represents the back extents of the section view.
-
Click Modify to end section tool.
-
Open Section 1 section view.
-
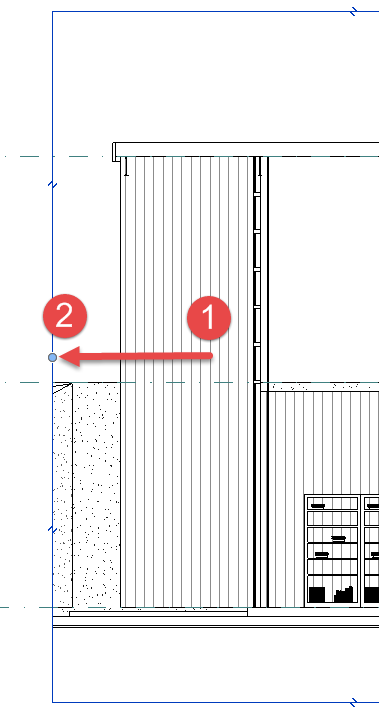
Select the crop region window and drag the left drag grip to the left to show the entire roof canopy.
-
Duplicate the {3D} 3D view and rename to: Residence building.
-
Open Residence building 3D view.
-
Right click over the View Cube to reveal the right click menu and select Orient to View (Mark 1) and select Sections>Section:Section 1 view (Mark 2).
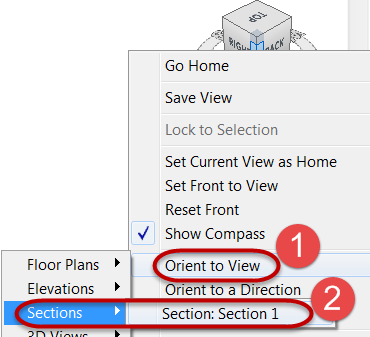
Note: You should now see a 2D orthographic representation of the Residence building in a 3D View.
-
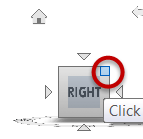
Orient the 3D view to an axonometric representation. Left click on the upper right corner of the View Cube to tilt the view into a 3D orientation.
-
Finished orientation of 3D view shown below.
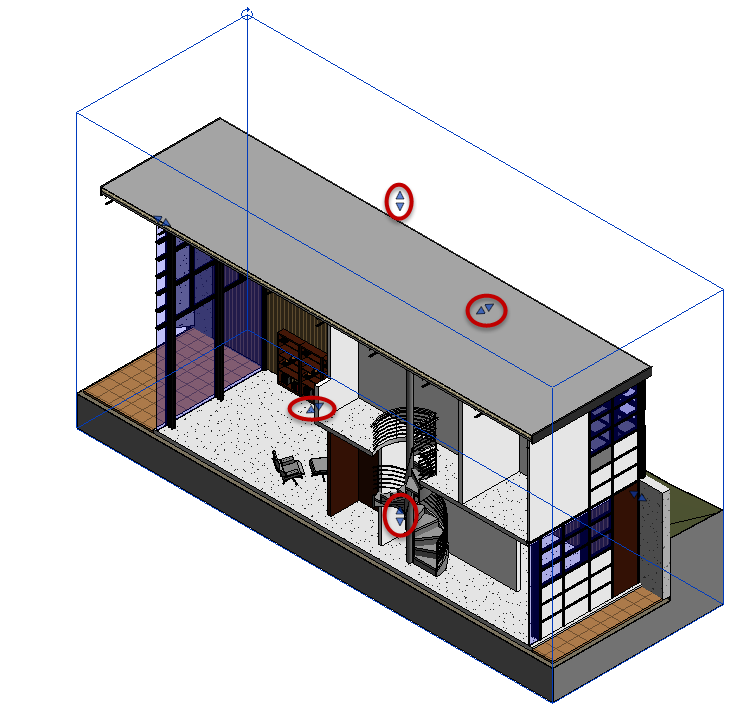
Note: You can select the Section box and drag the handles to crop the view even more in a non-destructive way.
-
Save the Revit file as: Module06Ex03.rvt
This concludes Exercise 3.