Views and Visualization - Exercise 2
Learn Revit > Module 6 > Exercise 2
Exercise 2 — Creating Elevation and Section Views
In this exercise, you will learn create elevation views and modify its view properties.
Objectives:
-
Place elevation tags to create new elevation views.
-
Draw section lines to create new section views.
-
Modify view properties to adjust the crop region, level of detail, and scale of elevations and sections.
-
Set visibility graphics overrides to choose which types of objects appear in the views.
Create interior elevation views of the living area of the Residence building
-
Download the start file here.
-
Open First Floor plan view.
-
Zoom into the Residence Living Room area.
-
On the Views tab, Create panel, click the Elevation pulldown menu and select Elevation.
-
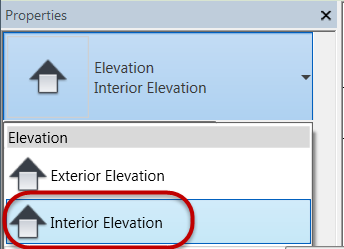
In Properties palette, click Interior Elevation tag.
-
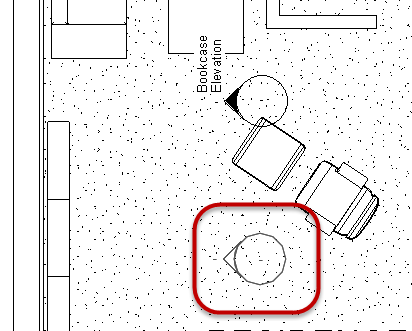
Place Interior Elevation tag at the location shown.
-
Hit ESC key twice to end the command.
-
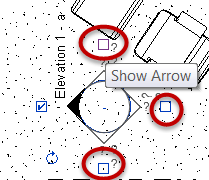
Turn on all elevation views for the Interior Elevation tag.
a. Select the interior elevation tag.
b. Mark the Show Arrow boxes for all elevations by left clicking with mouse.
-
Hit Modify command to unselect tag.
-
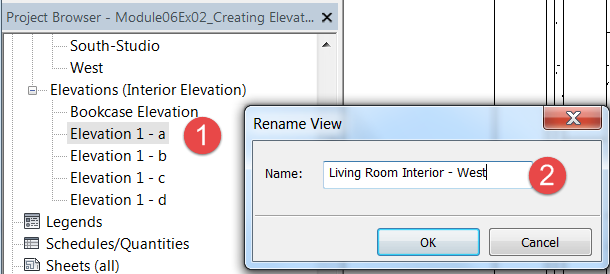
Name each of the elevation views.
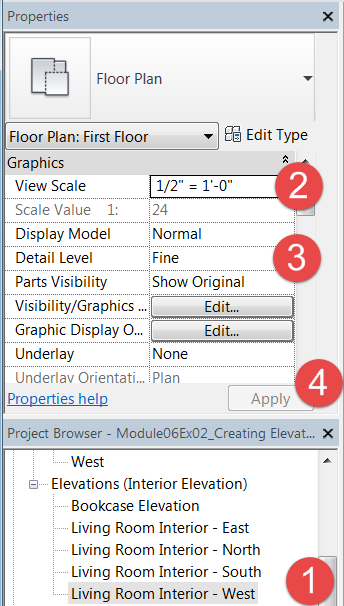
a. In Project Browser, scroll down and expand the Elevations (Interior Elevations) folder (Mark 1) and then rename the view Elevation 1-a via right click menu to: Living Room Interior - West. (Mark 2) and click OK.
b. Repeat and name the remaining elevations:
Living Room Interior – North
Living Room Interior – East
Living Room Interior – South
-
Change interior elevation view scale.
a. Open Living Room Interior - West elevation view (Mark 1) in Project Browser, then set view scale property to: ½” = 1’-0” (1:25) (Mark 2).
b. Set Detail Level: Fine. (Mark 3).
c. Click Apply (Mark 4).
-
Create a view template from Living Room Interior – West view.
a. Open Living Room Interior – West elevation view.
b. Right click interior elevation view.
c. Select Create View Template from View.
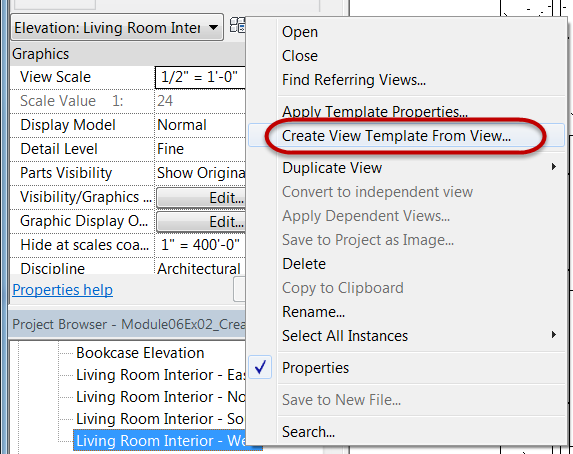
d. Name view template: Interior Elevation
e. Click OK.
f. Confirm settings for Interior Elevation view template is correct in the dialog box.
g. Click OK to exit dialog box.
-
Apply view template to the remaining interior elevations created previously.
a. Open Living Room Interior – North elevation view.
b. Right click elevation view in Project Browser and select Interior Elevation and click OK.
c. Repeat for remaining elevations.
-
Change depth of field for interior elevation.
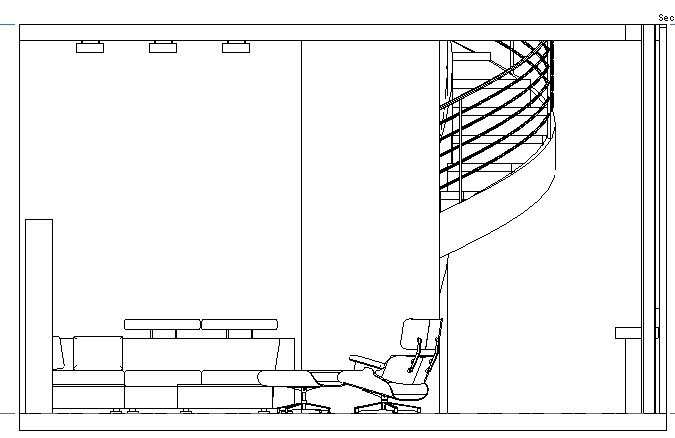
a. Open Living Room Interior – North elevation view.
Note: The spiral stair is partially displayed. We will correct this in the following steps.
b. Open First Floor plan view.
c. Select the arrow on the tag for the north elevation to reveal the crop extents (Mark 1) and drag the drag handle for the elevation extents (Mark 2) beyond the spiral stair.
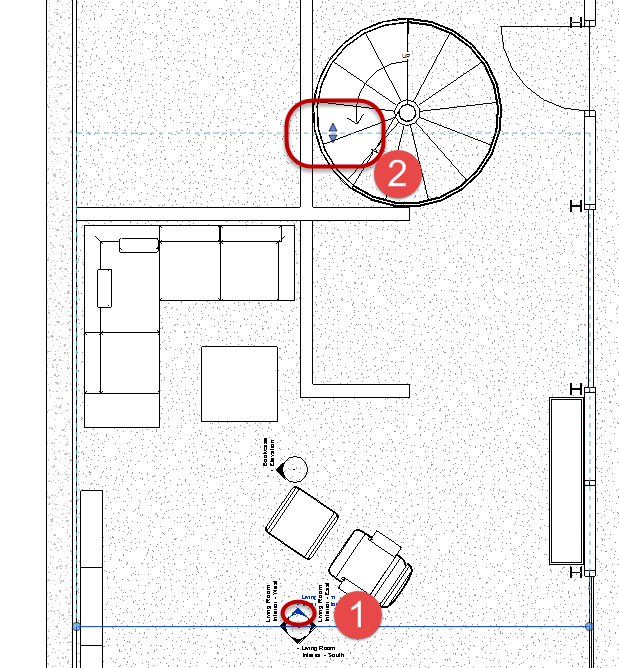
d. Click Modify command to exit editing tag.
-
Open Living Room Interior – North elevation view.
-
Save the Revit file as: Module06Ex02.rvt
This concludes Exercise 2.