Interiors and Circulation - Exercise 4
Learn Revit > Module 4 > Exercise 4
Place elevator components on first and second floors in the Studio space
-
Download the start file here.
-
Open the First Floor plan view.
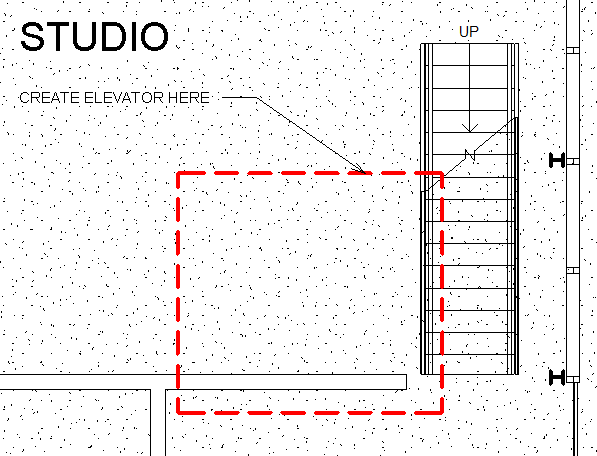
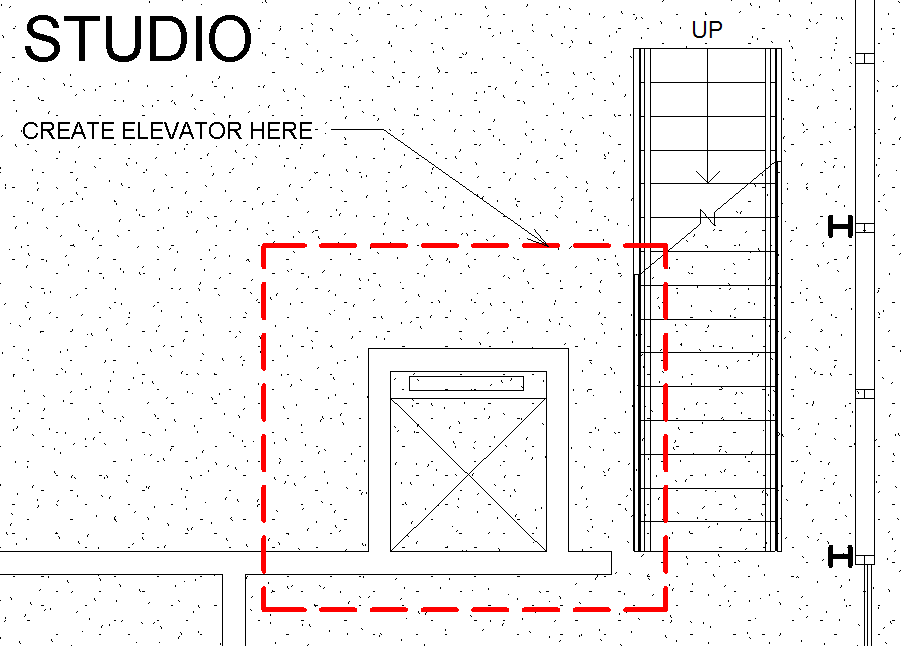
a. Starting Elevator layout.
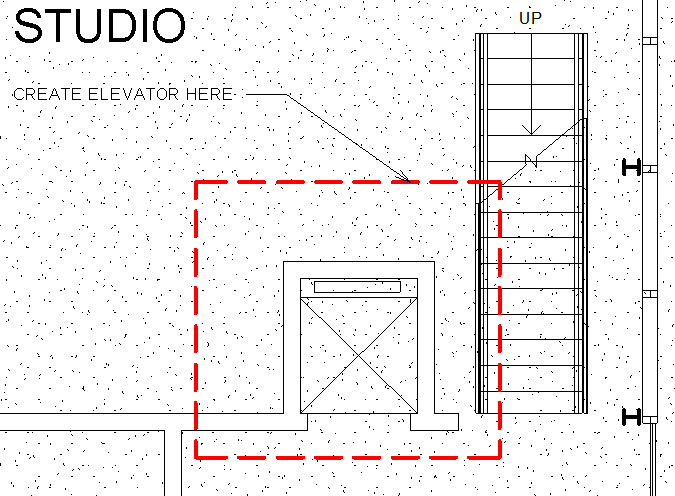
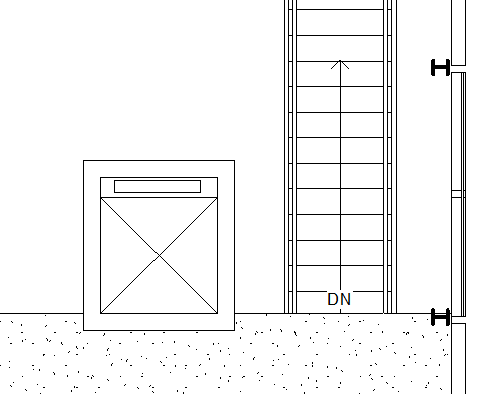
b. Finished Elevator layout.
-
Place elevator components.
a. On Architectural tab, Build panel, click Component tool.
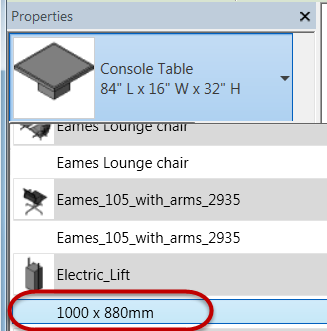
b. In Properties palette, select Electric_Lift 1000 x 880mm.
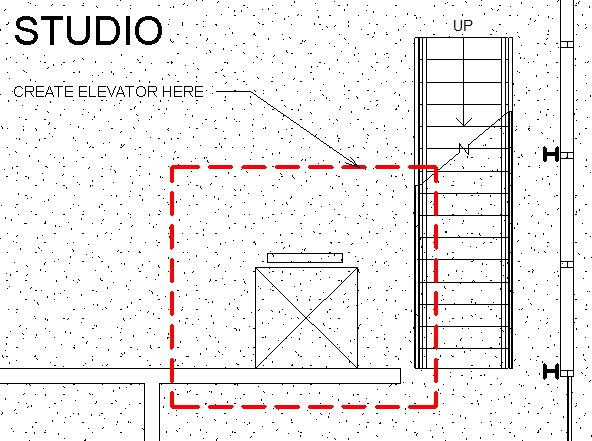
c. Place elevator component at location shown with the edge aligned with the wall face.
d. Select elevator component just placed and use Copy to Clipboard from the Clipboard panel.
e. Open Second Floor plan view.
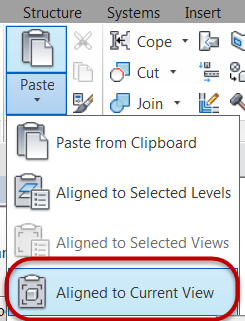
f. On the Modify tab, Clipboard panel, select Aligned to Current View from the Paste pulldown menu to place another instance of the elevator.
g. Click Modify to end the placement command.
Add elevator enclosure walls
-
Open the First Floor plan view.
a. On the Architecture tab, Build panel, click the Wall tool.
b. In the Properties palette, select the Generic Wall – 6” wall type.
c. Set Height constraint = Roof.
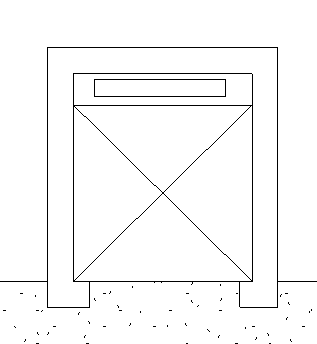
d. Layout the walls as shown below.
*Note: This particular design does not require Shaft Openings between floors for the elevators. In other cases you would use this element type to create openings in floors.* -
Open the Second Floor plan view.
a. On the Architecture tab, Build panel, click the Wall tool.
b. In the Properties palette, select the Generic Wall – 6” wall type.
c. Set Height constraint = Roof.
d. Layout the wall as shown below.
Create wall openings for elevators
-
Open the Second Floor plan view.
a. On the Architecture tab, Opening panel, click the Wall Opening tool.
b. Layout the wall opening as shown below.
c. Edit the wall opening element properties.
I. Select the wall opening element
II. Change opening properties in Properties palette as shown. Set Unconnected Height to 2.13m
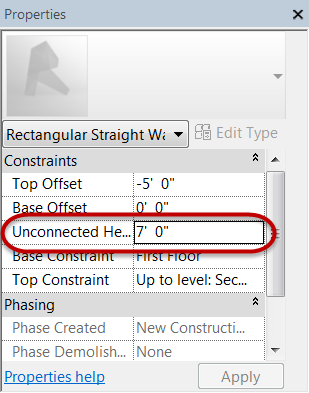
III. Click Apply to accept.
d. Open the First Floor plan view.
e. Repeat the steps again to create a wall opening.
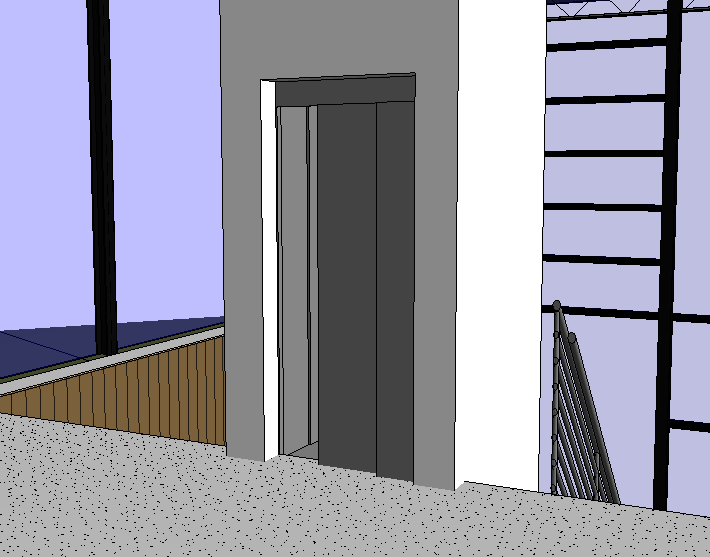
f. Open Second Floor – Elevator 3D view to check progress.
Add guardrails
-
Open the Second Floor plan view.
a. On the Architectural tab, Circulation panel, from the Railing tool pulldown menu, click Sketch Path.
b. Layout railings below using: Guardrail – Pipe.

c. Finished elevator core and railing layout.

-
Save the Revit file as: Module04Ex04_Finished