Interiors and Circulation - Exercise 3
Learn Revit > Module 4 > Exercise 3
Exercise 3 — Creating a Floor Opening
In this exercise, you will create a floor opening for the spiral stair created in the previous exercise and add protective railing.
Objectives:
-
Cut an opening to allow stairs to pass through floors.
-
Calculate the head height of stairways.
-
Modify floor openings.
-
Create railings.
-
Modify the physical properties of railings.
Create floor opening
-
Download the start file here.
-
Open the Second Floor plan view.
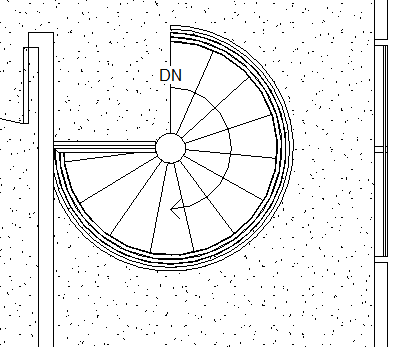
a. Starting spiral stair layout.
b. Finished spiral stair layout.
-
Select the second floor plate.
a. Create a crossing-window selection set starting just outside the East wall and dragging inwards into the building.
b. Click the Filter tool to isolate the Floors category.
-
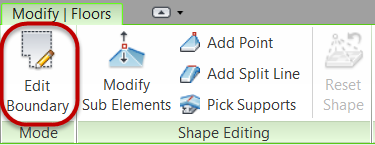
Edit floor boundary.
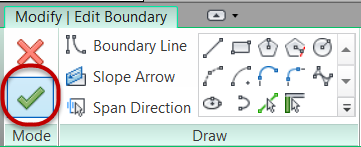
a. On Modify | Floors tab, Mode panel, click Edit Boundary.
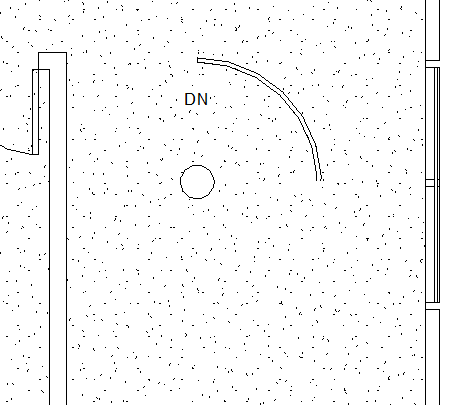
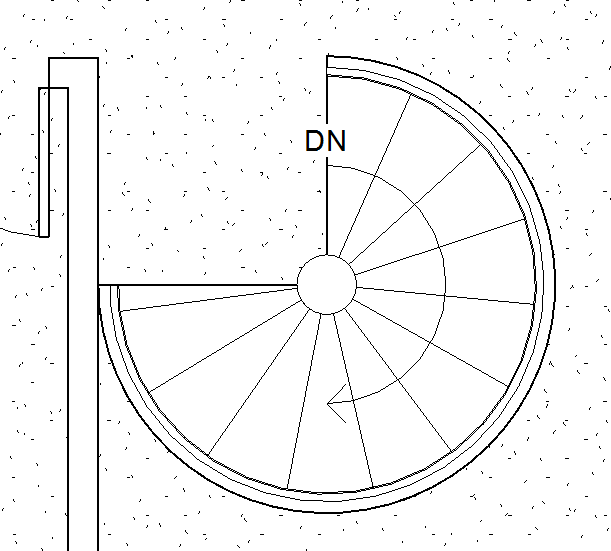
b. Using the Line tool from the Draw panel, sketch out lines indicated by Mark 1 and Mark 2 below.

c. Switch to Center-ends Arc tool and draw an arc with a 1.16m radius starting from the North side and ending at 180 degrees. Refer to picture above.
d. Hit ESC key once to end the sketch mode.
e. Select the Arc line and drag the endpoint clockwise to the 270 degree angle. Use the trim tool to clean up the linework as needed.
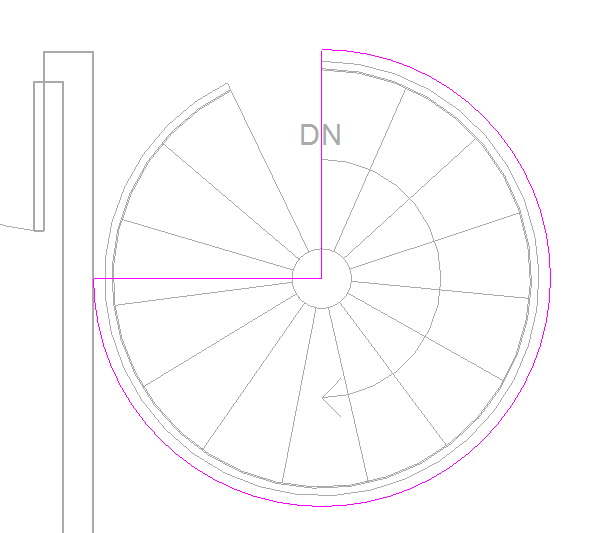
f. Click the Finish Edit Mode to generate the floor opening.
g. If you receive a warning message, click Unjoin elements.
h. Finished floor opening result below.
Add railing to floor opening
-
On the Architectural tab, Circulation panel, from the Railing tool pulldown menu, click Sketch Path.
-
Draw linear railing.
a. Use the Line tool to sketch the horizontal line from the column to the edge of the wall indicated by Mark 1.

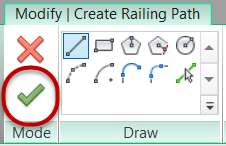
b. Click Finish Edit Mode to generate the first railing element.
Note: Railing sketches must be contiguous. The circular railing will be created separately.
-
Draw curvilinear railing.
a. Use the Center-ends Arc tool to sketch a curvilinear line tracing the floor opening starting at the top of the stairs and dragging the arc clockwise to the 180 degree position.

b. Hit ESC key twice, then select the arc line and drag the end point from 180 degrees to 270 degrees.
c. Click Finish Edit Mode to generate the first railing element.
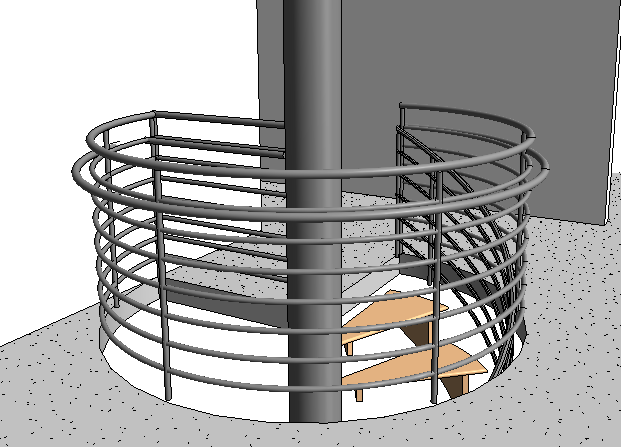
d. Open Second Floor – Spiral Stair 3D View to see the finished railing result below.
-
Save the Revit file as: Module04Ex03_Finished