Interiors and Circulation - Exercise 2
Learn Revit > Module 4 > Exercise 2
Exercise 2 — Modeling Custom Stairs
In this exercise, you will use various methods to customize stairs via Type Properties and Instance Properties.
Objectives:
-
Edit the sketch to change the stair boundary and shape of the risers.
-
Change stair and rail types.
-
Modify the steepness of a stair by adjusting the settings in the Properties
palette.
-
Create and edit a spiral stair.
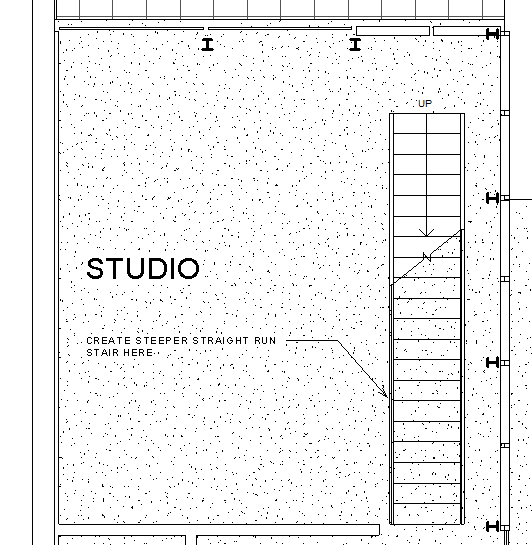
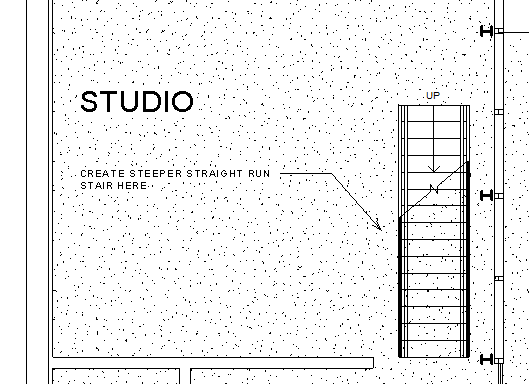
Create a steeper stair type for the Studio space
-
Download the start file here.
-
Open First Floor plan view.
a. Starting stair layout.
b. Finished stair layout.

-
Create a new stair type.
a. Select and delete the existing stair.
b. In the Architectural tab, Circulation panel, click Stair by Sketch method.
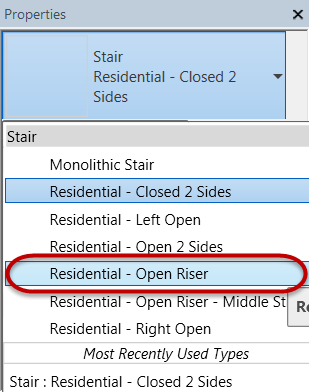
c. In Properties palette, select stair type: Residential – Open Riser.
d. Click Edit Type.
e. Click Duplicate.
f. Rename new stair type as: Residential – Open Riser - Steep.
g. Set stair properties as follows:
Min Tread Depth = 0.22m

Max Riser Height = 0.22m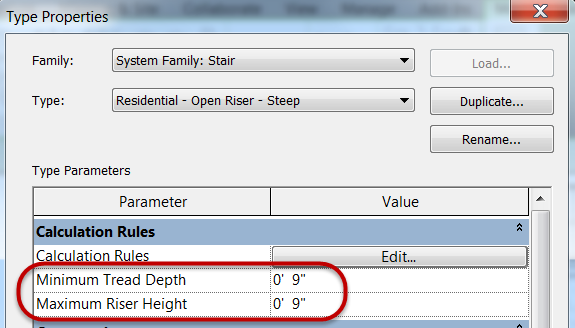
h. Click OK to accept values and exit dialog boxes.
-
Create a new stair in the Studio room.
a. Set the base of the stair across from the column and dragging the cursor downwards towards the opening and setting the upper level of the stairs just beyond the bounding box.
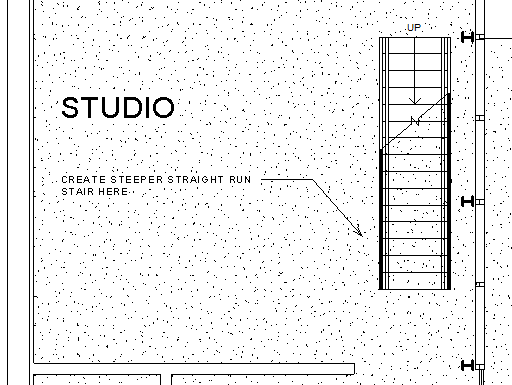
b. Move the upper level edge of the stair to align with the top edge of the wall opening.
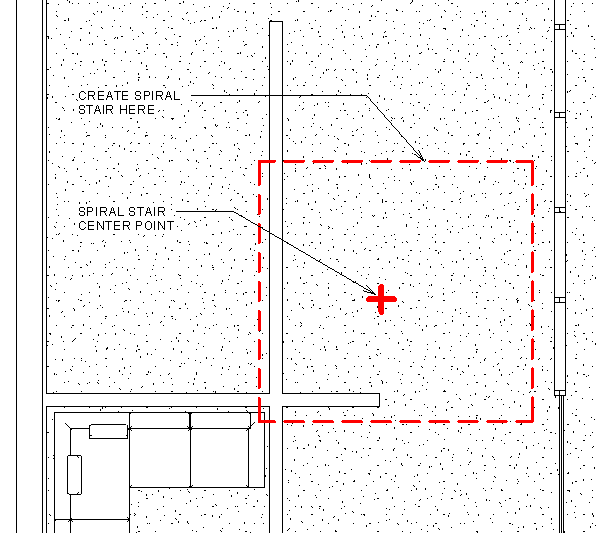
Create a spiral stair for the Residence space
-
In the First Floor plan view, pan downwards until you see the dashed boundary with red lines where the spiral stair will be placed.
-
Create a new stair type.
a. Select and delete the existing stair.
b. On the Architectural tab, Circulation panel, click Stair by Sketch method.
c. In Properties palette, select stair type: Residential – Open Riser.
d. Click Edit Type.
e. Click Duplicate.
f. Rename new stair type as:
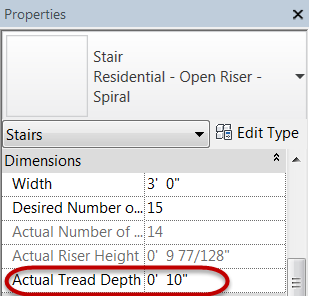
Residential -- Open Riser - Spiral.g. Set stair properties as follows:
Min Tread Depth = 0.27m

Max Riser Height = 0.25m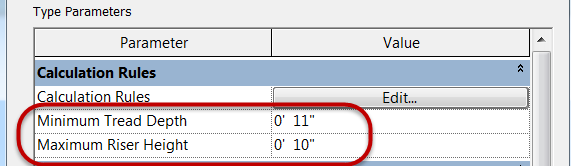
h. Click OK to accept values and exit dialog box.
-
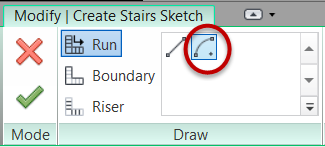
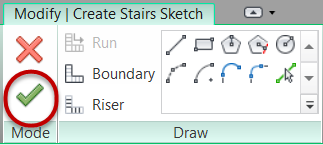
Create spiral stair.
a. Click Center End Arc mode.
b. Place center point at red X origin point.
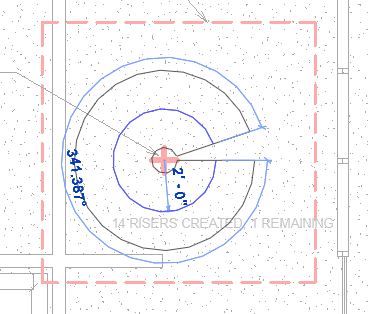
c. Set Run radius = 0.60m.
d. Left click to set the upper level of the stair.
*Note: You will receive a warning message that the stair cannot be completed because it would revolve more than 360 degrees. We will address this next.*e. In Properties palette, set Actual Tread Depth = 0.25m.
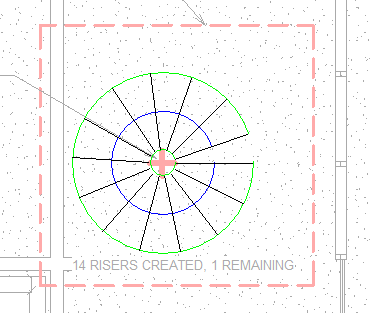
f. Erase the existing spiral stair sketch.
g. Resketch stair sketch.
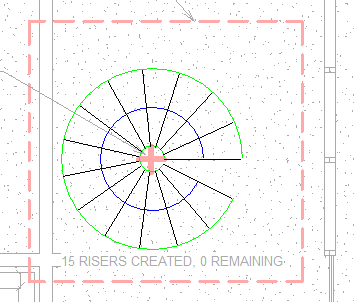
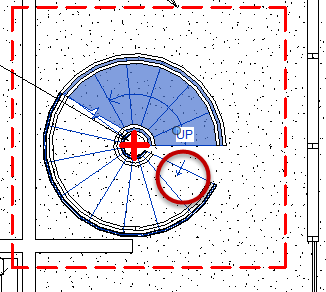
*Note: Confirm that 0 risers are remaining.*a. Click Finish Edit Mode to create the 3D stair.
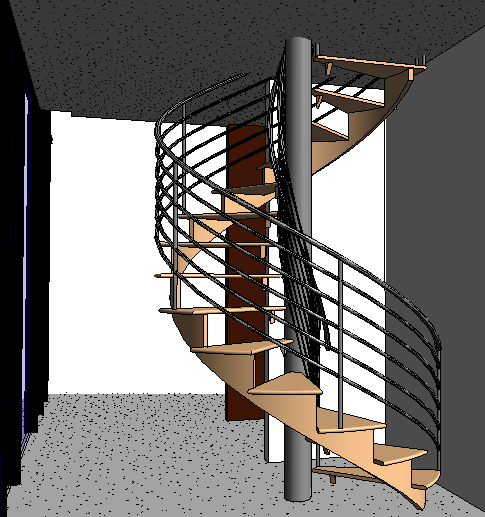
b. Progress stair shown below.
-
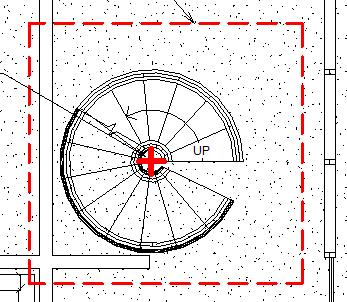
Spiral stair fit and finish.
a. Flip the stair direction, select the stair and click the Flip grip highlighted in the red circle.
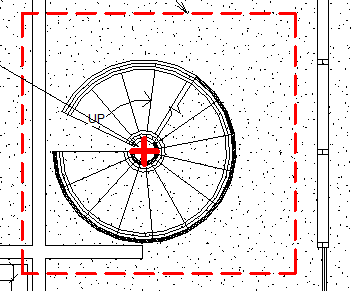
b. Rotate the stair so the upper level is horizontal. Select stair and Click the Rotate tool in the Modify panel.
-
Change stair handrail type to:
Handrail – Pipe.
-
Add a center pole for spiral stair.
a. On the Architectural tab, Build panel, click Column: Architectural tool from the pulldown menu.

b. In Properties palette, select:
Round Column -- 8" diameter and set Height constraint to Roof.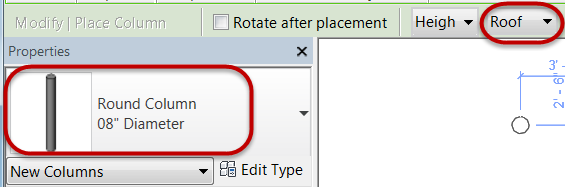
c. Locate column center at center of spiral stair.
-
Open First Floor – Spiral Stair 3D view.
-
Save the Revit file as: Module04Ex02_Finished.rvt