Curtain Systems - Exercise 3
Learn Revit > Module 3 > Exercise 3
Exercise 3 — Creating curtain panel types
In this exercise, you will create a curtain panel type and layout for the house used in the previous exercise using Autodesk Revit.
Objectives:
-
Select individual curtain wall panels.
-
Change curtain wall panels to different types.
-
Select multiple curtain wall panels to be modified at once.
-
Create new curtain panel types and specifying their properties.
Assign curtain panels to specific locations on a curtain wall by substitution in-place
-
Download the start file here.
-
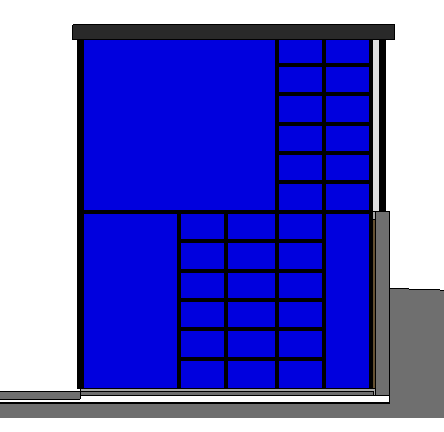
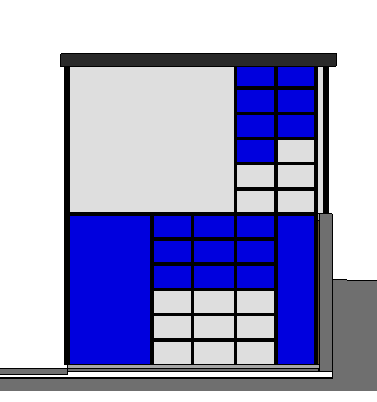
Open the North-Residence elevation view.
a. Starting curtain panel layout.
b. Finished curtain panel layout.
-
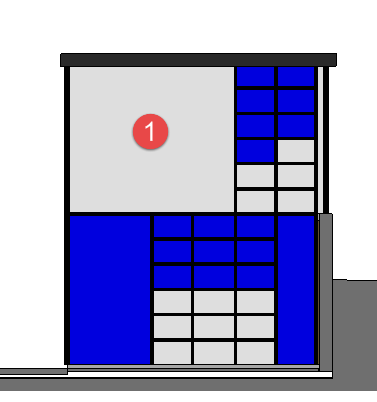
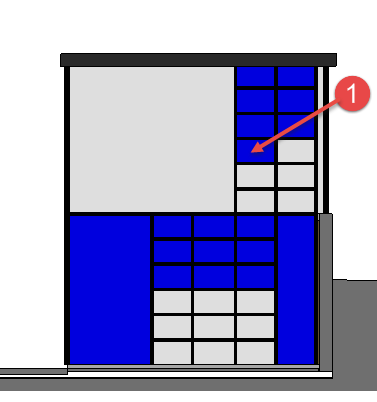
Apply Solid – White curtain panel to upper left curtain panel indicated by Mark 1 below. Make a selection set of curtain panel using any of the techniques below.
a. Tab selection technique:
i.  Hover over mullion edge adjacent to panel 1.

ii. Hit the Tab key 3 times to cycle through elements and acquire a tool tip that reads curtain panel.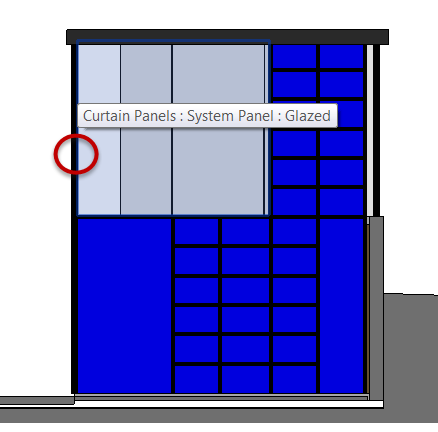
iii. Left click to accept selection set.b. Window and Filter selection set technique:
i.  Create either a crossing window selection set window through panel 1 from the roof down into panel 1 or create a normal selection window around panel 1.

ii. Click Filter from Selection panel.
iii. Isolate Curtain Panels category. Click Check None, then mark Curtain Panels category, and finally Click OK to continue.
*Note: Window selections sets apply all the way through the model view and may obtain panels you can't see from that view. Experiment with where you create selection set windows.* -
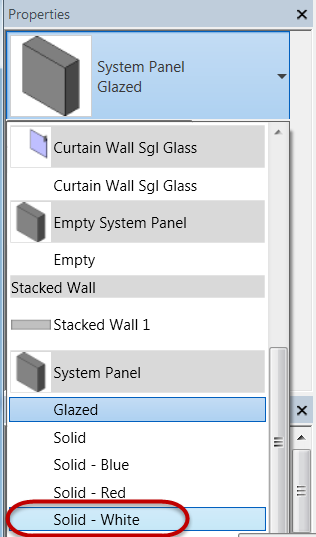
In Properties Palette, select Solid - White curtain panel.
-
Click Modify command to end command.
-
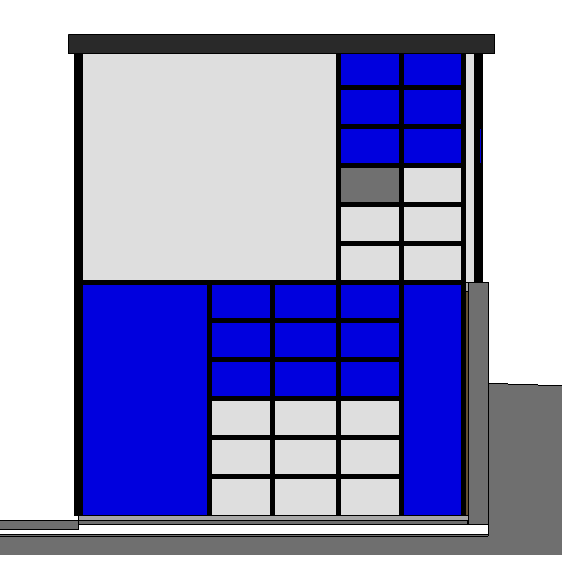
Complete the remaining White curtain panel assignments as shown below.
Create new curtain panel types, materials, and finish design layout
-
Make a selection set of curtain panel indicated by Mark 1 below.
-
In Properties Palette, click Edit Type.
-
In Type Properties dialog box, click Duplicate.
-
Rename to: Solid - Gray
-
Click OK to continue.
-
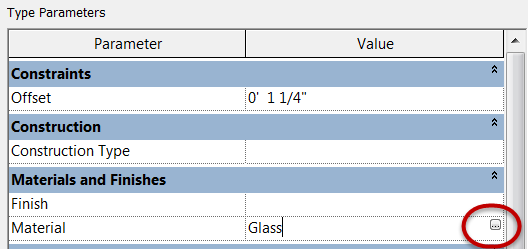
Left click in the value field for Material, then click the Browse button.
-
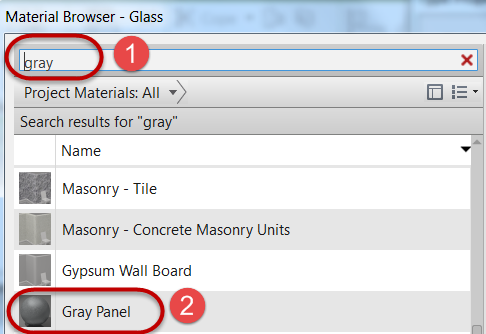
In the Material Browser, type: gray in the search window and select the Gray Panel material.
-
Click OK twice to continue.
-
Click Modify to end the command.
-
Progress result shown below.
-
Repeat the previous steps to create a new panel type called: Wood Panel – Dark.
a. Assign the material: Wood Panel – Dark.
b. Apply the material to the following curtain panel location shown below.

-
Save the Revit file as: Module03Ex03_Finished.rvt
This concludes Exercise 3.