Curtain Systems - Exercise 1
Learn Revit > Module 3 > Exercise 1
Exercise 1 — Modeling Wall Types, Structures, and Design Features
In this exercise, you will learn to substitute a curtain wall for an opaque wall and define its grid line layout through parametric rules.
Objectives:
-
Create new curtain walls.
-
Change the type of an existing wall to a curtain wall.
-
Adjust the placement and orientation of curtain walls.
-
Define curtain wall type properties to automatically place curtain grids and
mullions.
Create a new curtain wall type and define its properties
-
Download the start file here.
-
Open the First Floor plan view.
-
Create a new curtain wall type.
a. Select the exterior wall indicated by Mark 1 below.
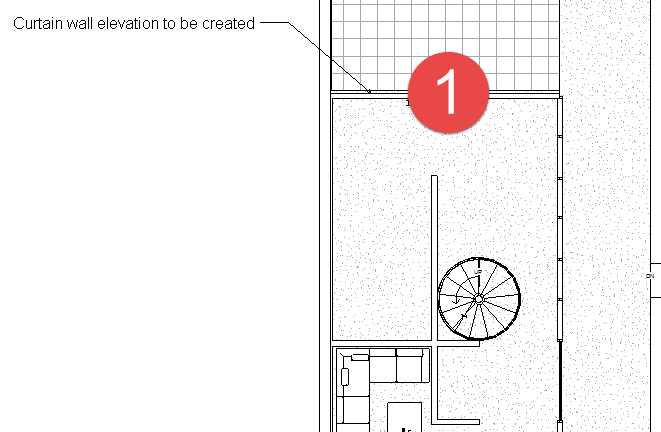
b. In Properties Palette, select:
Curtain Wall 2 wall type.
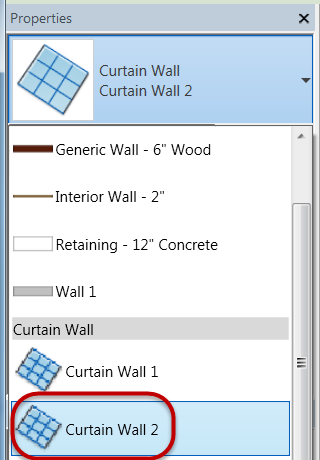
Note: Curtain Wall 2 creates a singular plate of glass to the extents of the wall area with no 3D geometry automatically created for mullions.
c. In Properties palette, click Edit Type.
d. In Type Properties dialog box, click Duplicate.
e. Rename curtain wall to:
Residence NorthWall
a. Click OK.
-
Define curtain grid properties of new curtain wall.
a. Set type properties for vertical and horizontal grids to Fixed > Number.

*Note: We will specify actual quantity of grids in the Instance
properties.*
b. Click OK to continue.
c. In Properties palette, set grid properties as follows:

d. Click Apply to continue.
e. Click Modify to end the command.
-
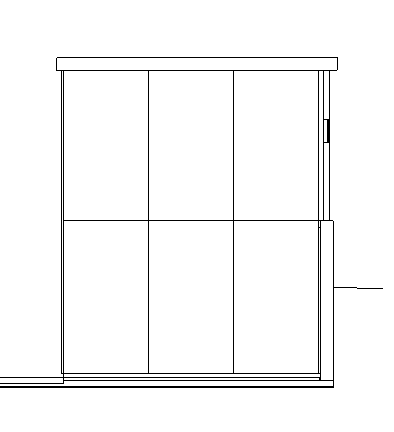
Open North-Residence elevation view.
-
Curtain wall should look like the finished one below.
-
Save the Revit file as: Module03Ex01_Finished.rvt
This concludes Exercise 1.