Building Envelope - Exercise 2
Learn Revit > Module 2 > Exercise 2
Adding Doors, Windows, and Wall Openings
In this exercise, you will add doors and window openings using the array command to the same house used in the previous exercise using Autodesk Revit.
Objectives:
-
Place windows and doors and change their location using temporary dimensions.
-
Use arrays to quickly place groups of regularly spaced windows.
-
Use the Group and Associate array option.
-
Edit door and window instance properties.
-
Create new window and door types.
-
Create wall openings.
Place and array exterior doors
-
Download the start file here.
-
Open the Floor – Living Area plan view.
-
On the View Control toolbar, set the visual style to Wireframe.

-
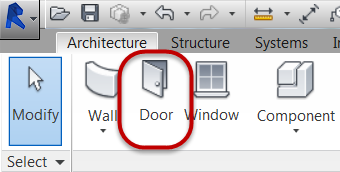
On the Architecture tab, click Door.
-
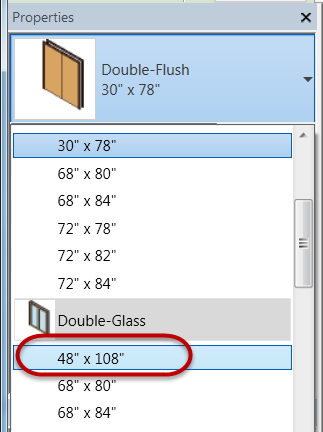
In Properties Palette, select Double-Glass 48” x 108” door type.
-
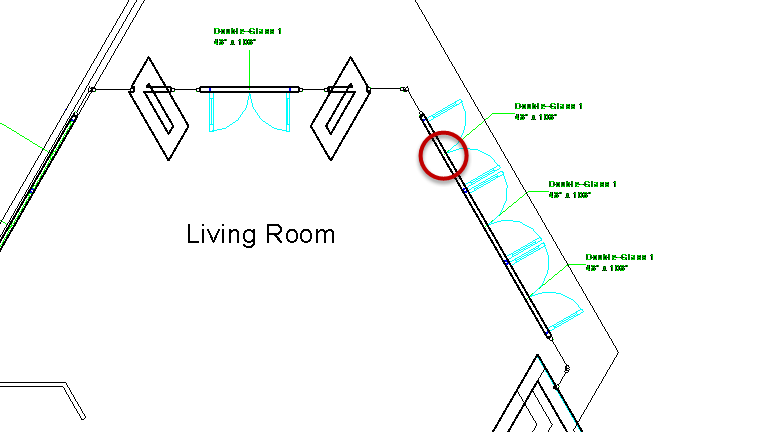
Place Double-Glass 48” x 108”door type at location shown below.
a. Hover cursor over Revit wall and use CAD underlay as a reference guide for handing and swing direction
b. Left click to place door
c. Hit ESC key twice to end the door placement command.
-
Array the previous door to create the remaining two doors along that wall.
a. Select the double door just placed in plan view.
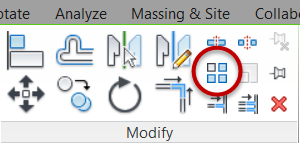
b. Click the Array tool in the Modify panel.
c. Set the Array number = 3.
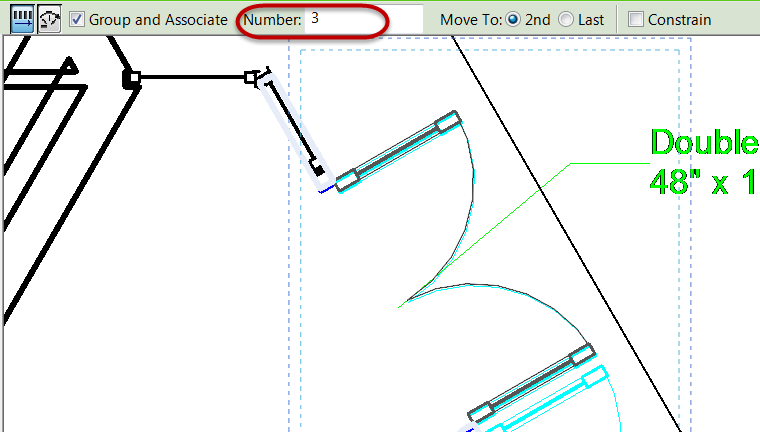
Note: This sets the total number of instances to be arrayed including the first door.
d. Set the array distance and direction graphically on-screen. Pick the two points shown below.
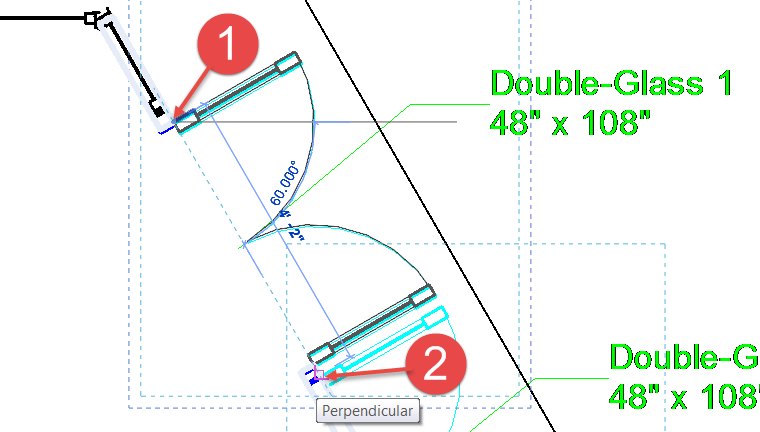
Note: Use the same reference point for point 2.
e. Hit the Enter key to accept the array.
f. Click ESC key twice to end the array command.
-
Open {3D} 3D view and confirm doors are inserted correctly as shown below.

Place and array exterior windows
-
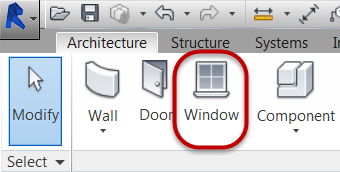
On the Architecture tab, click Window.
-
In Properties Palette, select Casement Dbl with Trim 48” x 72” window type.
-
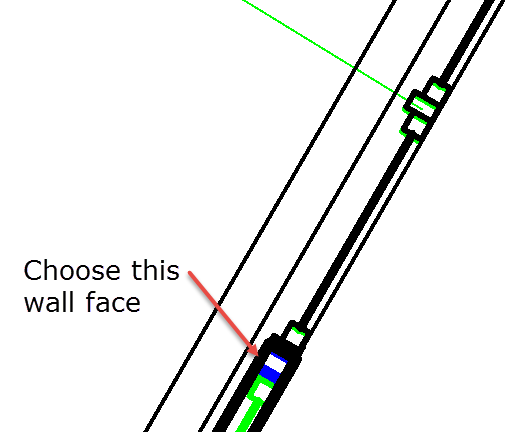
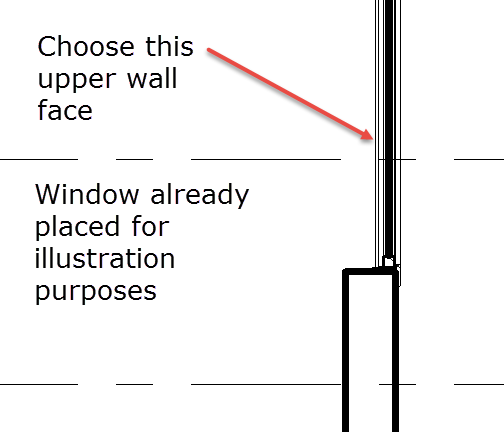
Place Casement Dbl with Trim 48” x 72”window type at location shown below.
a. Hover cursor over Revit wall and use CAD underlay as a reference guide for handing and swing direction.
Plan view enlarged
Section view
b. Left click to place window.
c. Hit ESC key twice to end the window placement command.
-
Array the previous window to create the remaining two windows along that wall.
a. Select the casement window just placed in plan view.
b. Click the Array tool in the Modify panel.
c. Set the Array number = 3.
d. Set the array distance and direction graphically on-screen. Pick the two points shown below.
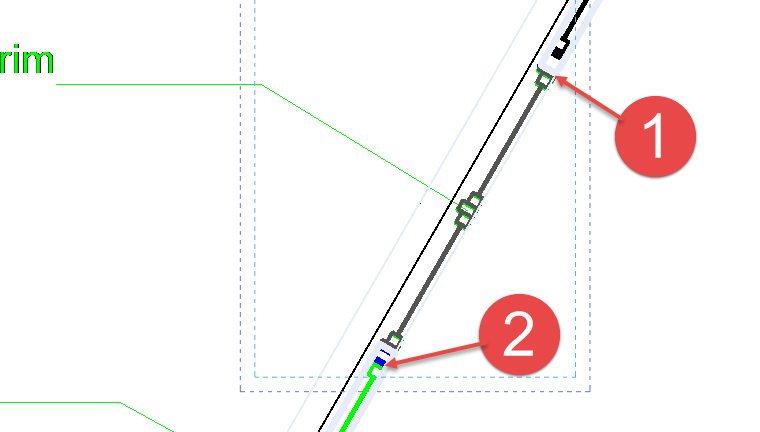
Note: Use the same reference point for point 2.
e. Hit the Enter key to accept the array.
f. Click ESC key twice to end the array command.
-
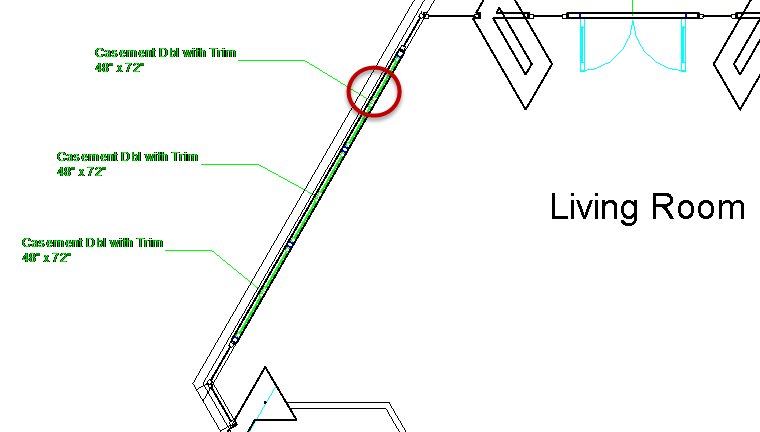
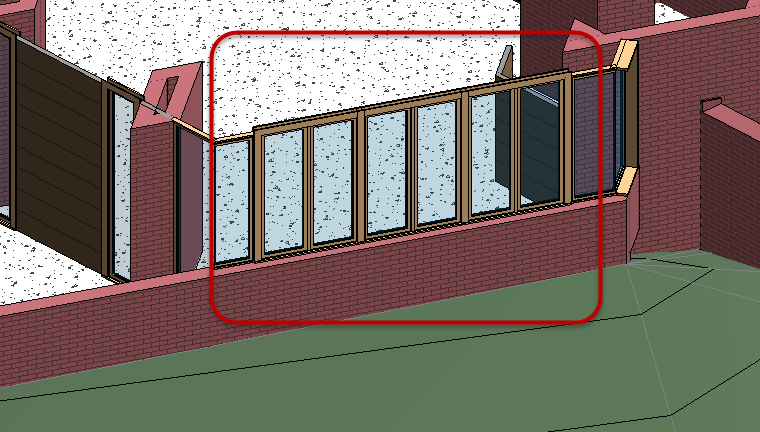
Open {3D} 3D view and confirm windows are inserted correctly as shown below.
-
Save the Revit file as: Module02Ex02_Finished.rvt and hand in.
This concludes Exercise 2.