Building Envelope - Exercise 1
Learn Revit > Module 2 > Exercise 1
Modeling Wall Types, Structures, and Design Features
Change exterior wall types through substitution in-place
-
Download the start file here.
-
Open the Ground Floor plan view.
-
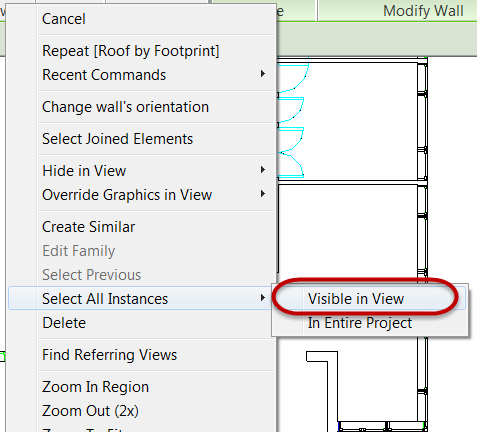
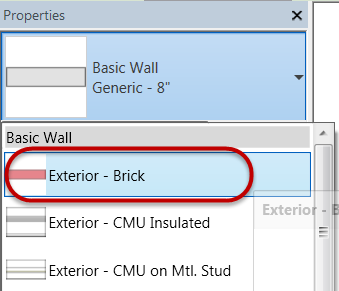
Select all exterior walls of Generic – 8” (0.2m).
a. Hover over an exterior wall.
b. Right click in the canvas window and select Select All > Instances>Visible in View.
c. Select Exterior – Brick wall type.
-
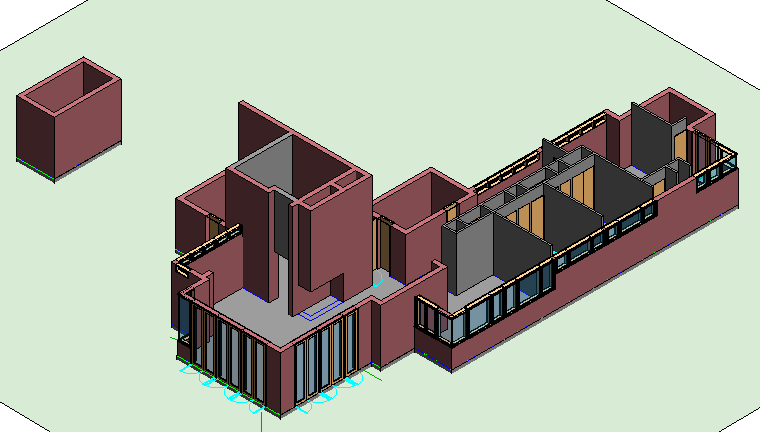
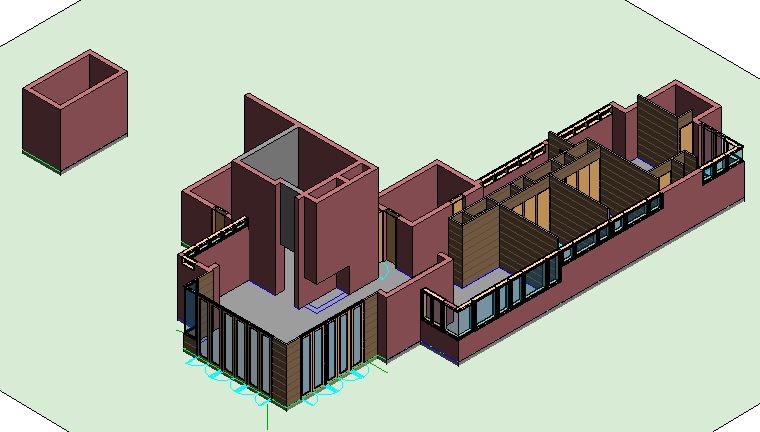
Open {3D} 3D View. Confirm exterior walls are brick.
Create a new interior wall type
-
Open the Ground Floor plan view.
-
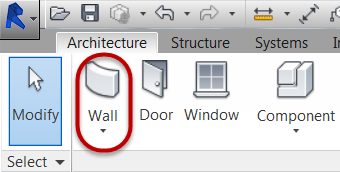
On the Architecture tab, click Wall.
-
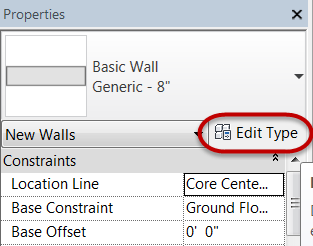
In Properties Palette, select Generic 8" (.20 m) wall type.
a. Click Edit Type.
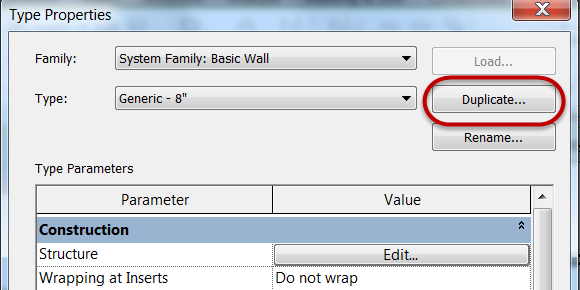
b. Click Duplicate.
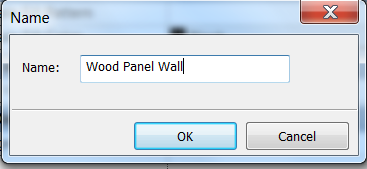
c. Rename to: Wood Panel Wall.
d. Click OK.
-
Define the material definition of the wall type.
a. Click Edit Structure.
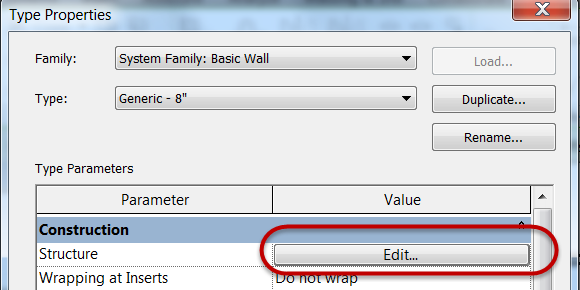
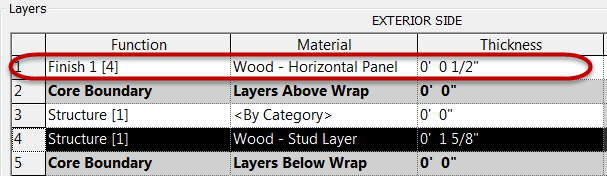
b. Edit Structure [1] to:
Material = Wood -- Stud Layer

Thickness = **0.041m**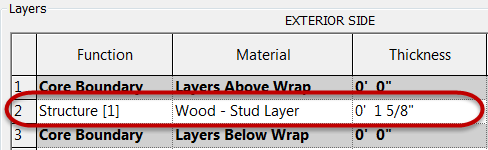
*Note: Use search window in the Material Browser and type
material name you are looking for.*
Structure [1] is associated with structural materials supporting a wall and has the highest cleanup priority.
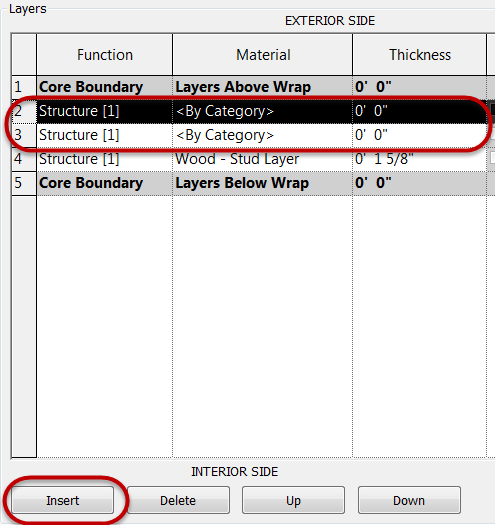
c. Click Insert button two times to add (2) new layers to the wall > definition
-
Edit Layer 2:
a. Select Layer 2 row
b. Click Up button once
c. Click Function = Finish 1 [4]
Note: Function determines a material layers behavior in the model environment for cleanup at wall intersections with other wall types. Material functions of the same kind will cleanup.
Finish 1 [4] is associated with exterior materials and is a lower priority than structural materials.
d. Change Material =
Wood - Horizontal Panel
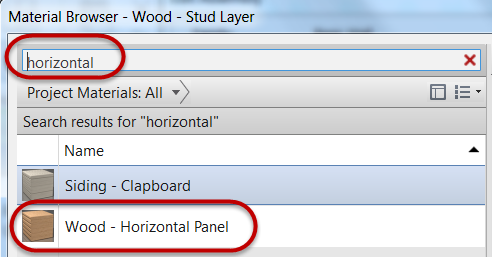
Note: Use search window in the Material Browser and type material name you are looking for.
e. Change Thickness = 0.012m
-
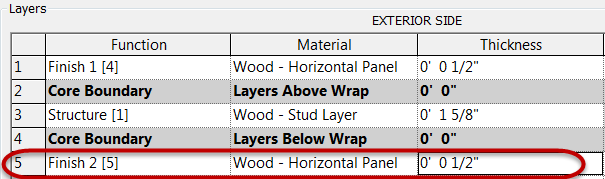
Edit Layer 3:
a. Select Layer 3 row
b. Click Down button twice
c. Click Function = Finish 2 [5]
Note: Finish 2 [5] is associated with interior materials and is a lower priority than structural materials.
d. Change Material =
Wood - Horizontal Panel
e. Change Thickness = 0.012m
-
Click OK button twice to exit both dialog boxes
-
Click Modify to end the wall placement command
Change interior wall types through substitution in-place
-
Select all interior walls of
Interior - 3 1/8" Partition (1-hr) (0.79m).
a. Hover over an interior wall.
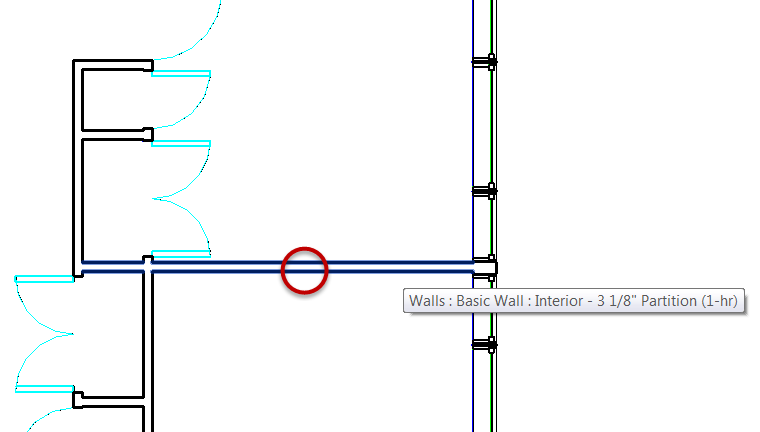
b. Right click in the canvas window and select Select All > Instances>Visible in View.
c. Select Wood Panel Wall wall type.
-
Open Ground Floor plan view.
-
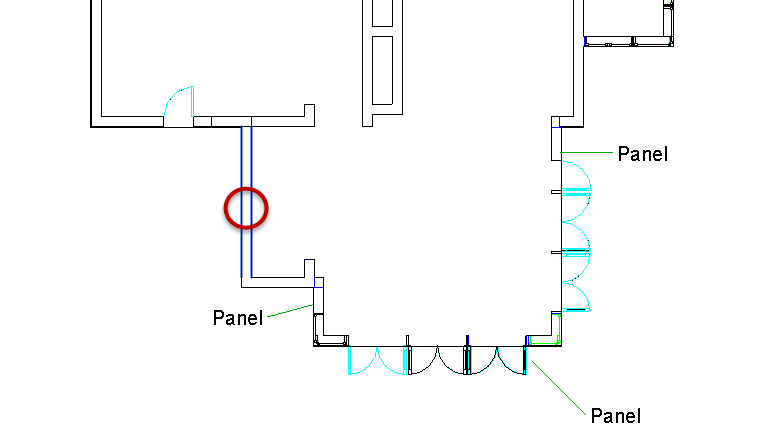
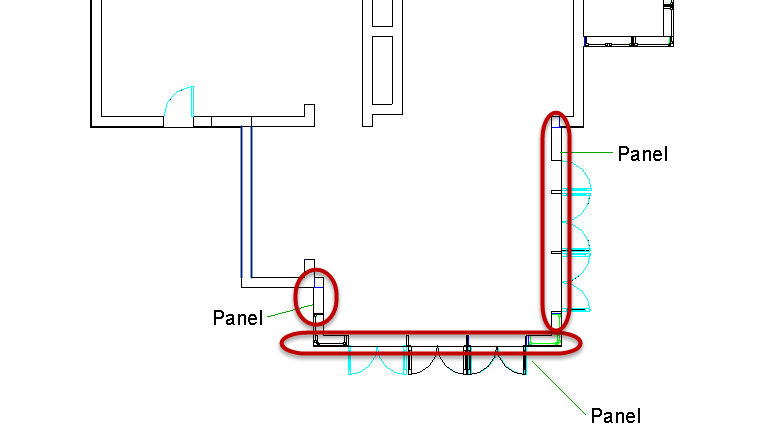
Select labeled exterior walls to receive Wood Panel Wall type.
-
In Properties palette, change wall type to: Wood Panel Wall type.
-
Open {3D} 3D View. Confirm interior walls and selected exterior walls have wood paneling.
-
Save the Revit file as: Module02Ex01_Finished.rvt and hand in.
This concludes Exercise 1.